Fitting a Cat Flap
Getting a cat flap fitted inside your home can be a huge step for any pet owner. Whether your cat is old and needs extra security or you have a new kitten who require a vet check, there are plenty of options out there to choose from. Installing a cat flap can be a daunting task for novices, but with the right instructions, it's not hard to complete. Preparation, planning and precision are the key to success. Choose the Right Door or Windows There are a myriad of kinds of cat flaps, including some with locks that can be used to prevent your pet from going out or inside, and others that have advanced features like microchips for door entry system. It is important to think about how it is easy to teach your cat how to use the flap, before you purchase and install one. Depending on the style of your home, it's usually best to put the cat flap near an opening or window that opens out into a sheltered area of the garden, so that your cat is secure when entering and leaving the home. This will also allow them to get back inside in the event of being chased by another animal or humans who want to harm them. It is possible to install a cat-flap inside a uPVC or composite door, but it's not as easy as putting one into a wood door. It's because uPVC or composite doors are available in a variety of thicknesses. cat flap installers can affect the method of cutting holes, and the type of door you can fix to. 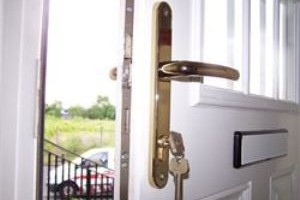 To avoid costly mistakes It is recommended that you consult an expert glazier before installing the flap on a door with a glass front. If you're installing the flap into the door made of wood, you should introduce your cat to it at first to ensure that it becomes familiar with its dimensions and shape. Take a look at your cat's belly measurement In order to install an appropriate cat flap that is a good fit for your pet, you'll have to measure your cat. This will allow you to make sure that the flap is at the correct height on the door or window and that it's big enough for him to enter and exit easily. To do this, place your pet on their back and run your fingers gently across their belly. Feel for any squishy fat pads which may be visible around their lower back, face, and the limbs. The extra padding shields your pet and allows it to move more freely, especially when performing feline Acrobatics. You can also consider your pet's weight as a way to determine the size of the opening you need. If your cat weighs up to 5Kg, for example the suggested flap size is 14 x 12cm. Take a measurement of your windows or doors As the name suggests this kind of cat flap is designed to be affixed to the door, and offers an opportunity for your pet to enter or leave as it pleases. The flaps are made of plastic or aluminum and are placed in the middle of the door. They have a dual swinging opening that can be opened by gently pressing on either side. The flaps are available in locking versions that offer added security, so your cat cannot simply traverse the door from outside. Cat flaps are also commonly used in windows. They are able to be easily installed, but they have to be installed at a high level as cats and dogs have a difficult time to get them. If the window is not sufficient in height to be used as a cat's flap, you can use steps, ramps or specially designed stairs to help the animal reach it. It is possible to install an egress into the brick wall, however it is not recommended for people who aren't experienced in brickwork. This could weaken the wall's structure. Before you begin, it's important to ensure that the wall is free of cables and pipes. You should always consult an expert if you have to make a hole for pipes and cables. It's also advisable to wear safety goggles and a dust mask to avoid breathing in any sawdust generated by cutting into the walls of your house. Select the Right Cat Flap There are many different cat flaps available and each one comes with different features. Certain cat flaps come with security features such as magnetic locks or microchips which prevent unauthorised entry. They also stop your pet from letting friends or animals to enter the house. Some seals are weatherproof and insulation to block out the elements and keep out drafts. There is also a choice of sizes, based on the size and breed of your pet. Certain cat flaps are available in rectangular shapes, whereas others are circular or square. The best type of cat flap will be determined by the space you have available as well as the type of window or door you want to attach it to. Last but not least, think about the opening mechanism the cat flap will employ. A simple aluminum or plastic swing-out door is one alternative and is usually the least expensive. However, it will not prevent other cats or pets from gaining access and you could let draughts through as well. It's time to install your cat flap. Determine the belly height of the door using your ruler. Use a spirit level to make sure that the line is sitting straight against the door and not too low. Utilize your spirit level to draw a template for the flap for cats. Then, using a jigsaw, cut out the outline of the door. Once you are satisfied with the result, sand the edges down and drill through the pencil marks to make holes for screws. Make sure you have the tools ready It is essential to have the right tools when undertaking any DIY project. The most important things you'll require are the cat flap itself along with a tape measure, an excellent pencil, a spirit level, drill, file and an jigsaw (depending on your door or window type). If you're installing a composite door, you should consult with the manufacturer prior to making any alterations because this could invalidate the warranty or break the weathertight seal. In this instance you'll likely have to install a new pane of toughened glass instead. For wooden or uPVC doors, you'll need to cut out the shape of your cat flap using the Jigsaw. Follow the guidelines that are provided by the manufacturer. Use a template to mark out the size hole you'll need. After you have cut the hole, you'll have to sand the edges of the opening. This will help prevent future rust and water damage. It is also recommended to seal the holes in your window or door and the back of the flap to block rain and wind. Once the sealant has dried, you can install your new cat flap! Install the Flap Installing a flap allows your cat to go and come whenever it wants. This is a simple process that most people can accomplish by themselves, though you may require the help of a professional if you are installing the flap in the form of a glass door or another type of uPVC door. Look at the instructions included with the cat flap. There is an illustration of the template. This will give you an idea of where the holes for the flap need to be drilled in the door. Mark the areas in which you will need to drill with the pencil. After you've marked the area on your door, use the jigsaw and cut out the design for the cat flap. This is a fairly simple task, but you'll have to be comfortable using a Jigsaw. Many companies will complete this for you at a reasonable cost if you are hesitant to do it yourself. Then, screw the inner part to the hole in your door. It is possible to apply sealant prior to doing this to ensure it remains weather-proof and water resistant. The outside of your cat flap can be placed on the bolts' tops and then tacked together. You should test the cat flap on your cat to make sure that it is working correctly and that it allows them to exit and enter easily.